Are you tired of looking at those bare walls that scream "boring"? Or maybe you're stuck trying to hang pictures without making a mess or damaging your walls? Let me tell you something, friend—hanging pictures doesn't have to be a headache. With the right hanging picture tricks up your sleeve, you can transform any space into an art gallery masterpiece. Stick around because I’m about to drop some game-changing knowledge on you.
Let's face it, hanging pictures can sometimes feel like solving a puzzle. You want them to look perfect, but let's not forget the fear of crooked frames, wonky angles, or even worse—holes in the wall. But hey, worry no more! In this article, we’re diving deep into the world of hanging picture tricks that will make your walls pop and your heart skip a beat.
Whether you're a seasoned decorator or just starting out, these tips are here to save the day. So grab your favorite drink, sit back, and let's explore how to hang pictures like a pro. Trust me, your walls—and your sanity—will thank you for it later!
Read also:You Put The Lime In The Coconut Commercial The Hype History And Fun Facts
Why Hanging Picture Tricks Matter
Before we dive into the nitty-gritty of hanging pictures, let's talk about why mastering these tricks is essential. Hanging pictures isn't just about sticking nails into walls; it's about creating a visual story that reflects your personality and style. The right tricks can help you avoid common pitfalls and ensure your artwork stays secure and stylish.
Here’s the deal: improperly hung pictures can ruin the vibe of any room. They might fall off the wall, create unsightly holes, or simply look out of place. But with the right techniques, you can achieve that gallery wall aesthetic without breaking a sweat—or your wallet.
Basic Tools You'll Need
Before we get into the tricks, let’s cover the basics. You’ll need a few tools to make your picture-hanging journey smooth and successful. Here’s a quick rundown:
- A good-quality hammer (not the one you use for everything else)
- Nails or picture hangers (depending on the weight of your frames)
- A measuring tape (accuracy is key)
- A level (to ensure everything is straight)
- Wall anchors (if you're dealing with drywall)
Having the right tools makes all the difference. Don’t skimp on quality here—it could save you from disaster down the line!
Trick #1: Measure Twice, Hang Once
One of the most important hanging picture tricks is measuring twice before you hang. This might sound obvious, but trust me, it’s easy to skip this step when you're in a hurry. Taking the time to measure ensures your pictures are evenly spaced and aligned perfectly.
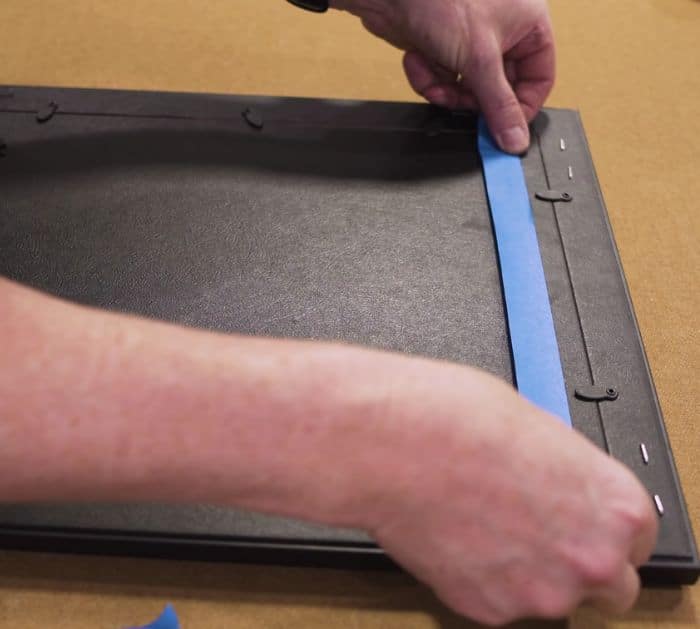
Here’s a tip: use painter’s tape to mark where you want your nails to go. This way, you can see how everything will look before committing to any holes in the wall. It’s like a dress rehearsal for your gallery wall!
Read also:Upgrade Your Living Room With A Stylish Maili Sectional Sofa
Why Measurement Matters
Proper measurement isn’t just about aesthetics—it’s about safety too. If you're hanging heavy frames, getting the placement right is crucial to prevent accidents. Plus, who wants to deal with crooked pictures every time they walk into a room?
Trick #2: Use Command Strips for Renters
If you're renting and can't make permanent changes to your walls, Command Strips are your best friend. These little wonders allow you to hang pictures without damaging the wall, making them perfect for temporary setups.
Just remember to follow the weight guidelines on the package. Overloading a strip can cause it to fail, leaving you with a dropped frame and a damaged wall. Trust me, it’s not worth the risk!
Benefits of Command Strips
- No nails or screws needed
- Easy to remove without leaving marks
- Perfect for lightweight frames
For renters, Command Strips are a lifesaver. They give you the freedom to decorate your space without worrying about losing your security deposit.
Trick #3: Create a Gallery Wall Layout on the Floor
One of the coolest hanging picture tricks is laying out your gallery wall on the floor before you start hammering. This allows you to experiment with different arrangements and see what works best without committing to anything.
Once you’re happy with the layout, measure the distances between each frame and transfer those measurements to the wall. It’s like creating a blueprint for your masterpiece!
Why Layout Matters
A well-planned gallery wall can elevate any room, but a poorly planned one can look chaotic and uninviting. Taking the time to plan your layout ensures your wall looks cohesive and polished.
Trick #4: Use Picture Hangers for Heavy Frames
When it comes to hanging heavy frames, picture hangers are your go-to solution. These sturdy hooks are designed to support the weight of larger pieces, keeping them secure and stable.
For extra-heavy frames, consider using two hangers instead of one. This distributes the weight evenly and reduces the risk of the frame falling.
Tips for Installing Picture Hangers
- Always check the weight capacity of the hanger
- Use wall anchors if necessary
- Ensure the hanger is securely attached to the wall
Investing in quality picture hangers is worth it if you want your artwork to stay put. Don’t cut corners here—it could cost you in the long run!
Trick #5: Hang Pictures at Eye Level
Another important hanging picture trick is hanging your artwork at eye level. This ensures that people can comfortably view your pictures without straining their necks.
A general rule of thumb is to hang the center of the picture at 57-60 inches from the floor. This height works well for most spaces and creates a balanced look.
Why Eye Level Matters
Hanging pictures too high or too low can disrupt the flow of a room. By keeping things at eye level, you create a harmonious visual experience that draws people in and makes them want to linger.
Trick #6: Use a Picture Hanging Kit
If you're new to hanging pictures, a picture hanging kit can be a lifesaver. These kits come with everything you need to hang your artwork safely and securely, including nails, hangers, and anchors.
Many kits also include a level and measuring tools, making the process even easier. It’s like having a personal assistant for your walls!
Advantages of a Picture Hanging Kit
- All necessary tools included
- Eliminates guesswork
- Perfect for beginners
For those who are intimidated by the idea of hanging pictures, a kit can provide the confidence boost you need to get started.
Trick #7: Use Wire for Extra Security
For larger or heavier frames, attaching wire to the back of the picture can provide extra security. This method distributes the weight evenly across the hanger, reducing the risk of the frame falling.
Here’s how to do it: attach D-rings to the back of the frame and run wire between them. Then, hang the wire on the picture hanger for a secure fit.
Why Wire Is a Game Changer
Using wire instead of a single hook can make a huge difference, especially for heavy frames. It’s a small step that can prevent big disasters down the line.
Trick #8: Experiment with Different Hooks
Not all hooks are created equal. Depending on the weight and size of your picture, you might need to experiment with different types of hooks to find the right one.
Some popular options include:
- Picture hangers for medium-weight frames
- Metal hooks for heavier pieces
- Tiny nails for lightweight photos
Choosing the right hook for the job ensures your pictures stay put and look great.
How to Choose the Right Hook
Consider the weight and size of your picture, as well as the type of wall you’re working with. For example, drywall requires different hooks than brick or concrete. Do your research and choose wisely!
Trick #9: Add Decorative Elements
Once your pictures are hung, consider adding decorative elements to enhance the look. This could be anything from plants to shelves or even fairy lights. These small touches can take your gallery wall from good to great.
Just remember to keep things balanced. Too many elements can overwhelm the space, so choose your additions carefully.
Why Decorative Elements Matter
Adding decorative elements can transform a simple gallery wall into a statement piece. It’s all about creating a space that reflects your personality and style.
Trick #10: Maintain Your Gallery Wall
Finally, don’t forget to maintain your gallery wall over time. Check the hooks and hangers periodically to ensure everything is still secure. If you notice any looseness, tighten the hooks or replace them as needed.
Regular maintenance ensures your pictures stay safe and your walls look great for years to come.
Why Maintenance Matters
Over time, hooks can loosen or frames can shift. Regular maintenance prevents small issues from becoming big problems and keeps your gallery wall looking its best.
Conclusion
Hanging pictures doesn’t have to be a daunting task. With the right hanging picture tricks, you can transform any space into a stunning art gallery. From measuring twice to experimenting with different hooks, these tips will help you achieve professional-looking results every time.
So what are you waiting for? Grab your tools and get started on that dream gallery wall. And don’t forget to share your progress with us in the comments below. We’d love to see how these tricks work for you!
Table of Contents
- Why Hanging Picture Tricks Matter
- Basic Tools You'll Need
- Trick #1: Measure Twice, Hang Once
- Trick #2: Use Command Strips for Renters
- Trick #3: Create a Gallery Wall Layout on the Floor
- Trick #4: Use Picture Hangers for Heavy Frames
- Trick #5: Hang Pictures at Eye Level
- Trick #6: Use a Picture Hanging Kit
- Trick #7: Use Wire for Extra Security
- Trick #8: Experiment with Different Hooks
- Trick #9: Add Decorative Elements
- Trick #10: Maintain Your Gallery Wall